Please note: these instructions apply to both Trinus PSVR and Trinus VR. For the latter, make sure External Input is set to Led Position Tracker in the Trinus SteamVR tab.
The Trinus camera based position tracking is currently in experimental dev stage. It has accuracy limitations, particularly in the z-axis (so it is recommended to disable the Depth option, at the moment) and at wide angles (45, 90 or 180 degrees to the sides or up and down, depending on the light conditions and distance from the camera).
Using a PS3Eye camera + CL-Driver is the recommended option as it can lead to the best tracking without much tweaking, but regular webcams will work too if set up correctly.
Please check the context help for each paramter to have a clear idea of how they work. These are the basic initial steps:
- Enable Positional Tracking and select your camera
- Press the test button and switch on the PSVR. You can press the Trinus Start button (on the main tab) if you want to test using the front leds, but you can already test with the leds on the back, which should light up when the headset is on (even if Trinus is not started)
- Point the headset at the camera to see the leds
- Modify the Camera Properties so that the leds are clearly differentiated from the surrounding . The Camera Properties dialog may not work for all cameras. Alternatively, configure through the software that came with your camera, using the Windows Camera application, or other software like YawCam or CL-Eye for PS3Eye (shown below)
- Depending on the room light conditions and the camera used, these are settings combinations that should work: low Gain and Exposure; low Brightness and Contrast; or low Brightness, high Contrast, high saturation. Auto options should be disabled in most cases

High Gain and Exposure, bad detection

Low Gain and Exposure, good detection
- Click one of the leds on the preview window to choose the color to detect: once to select the lighter led tone, and once again to choose the darker one. Note that you'll need to repeat color selection if you change the camera properties
- Then move the Color Range slider to set the thresholds on the selected colors. You can also enable the Masked Preview to see the filtered image
- You will see blue circles marking the detected leds. If these circles flicker or there are more than one per led, repeat the previous steps (camera settings, color selection and Color Range slider)

Bright lights causing false detections (too many blue circles)

Good camera settings, but bad selected colors and/or color range (leds with multiple circles per led, flickering)

Good camera settings, with increased Color Range slider (stable circle tracking)
- With stable led tracking, you can now stop the test and start Trinus + SteamVR. Repeat steps above if tracking is jittery
- Make sure you are at an optimal distance from the camera, so that the headset is always visible while moving. If it goes right when moving left, switch the Invert X checkbox
- Remember this an experimental, simple and cheap solution for position tracking, for better results try PSMoveService or NoloVR
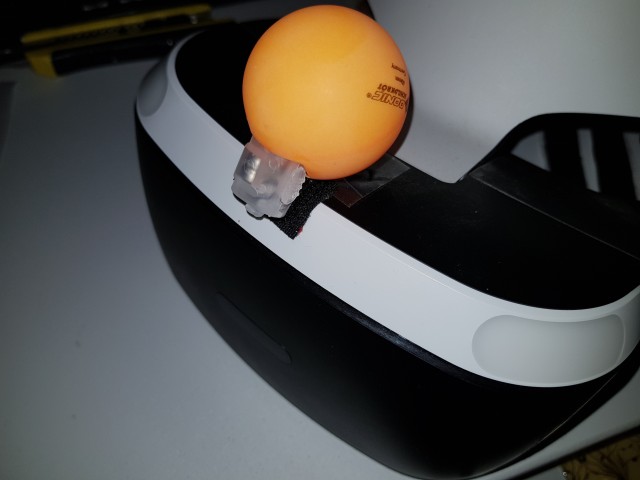
- You can also improve tracking using your own led system, with a lighted Ping Pong ball or a PSMove controller, for example. Just set the Leds option to None and experiment with different trackers!

Tracker with a ping pong ball, small led and velcro

Do a small cut on the ball to fit the led in. Add velcro to attach to headset

Attach to the front of the headset